The yellow circle is a pressure sensitive surface. By using three omni-directional wheels, the robot moves in the same direction as the animal. Experiment Bioroid! is like a vehicle for pets.
For safety, the robot has infrared sensors that stop the toy when it is close to an obstacle. To resume movement, the pet must start walking in another direction. The toy also stops when the creature is in the center of the yellow circle.
Bill of Material:
1. Blue base of the robot from Mattel Mindflex
2. Clear hemisphere from Superplexus
3. Plastic sheets 3mm thickness
4. 3x trapo omni wheels
5. 3x RC Servos HS-322HD
6. 3x Force-Sensing Resistors - 0.2" Circle
7. Arduino UNO
8. Arduino UNO proto shield
9. 3x Sharp Infrared distance sensors
10. 0.1" (2.54mm) Right Angle Male Double Row Pin Header
11. 3x 10k resistors
12. 50x N42 Neodymium Magnets Dia 3mm x 1.5mm Thick
13. 8mm Wide Angle LED 0.5 watt
14. 0.1" (2.54mm) Crimp Connector Housing
15. Female Crimp Pins for 0.1" Housings
16. 4x AA Battery holder
17. Toggle Switch
18. Wires
19. Velcro Sticky Back or 3m VHB
Now DIY!
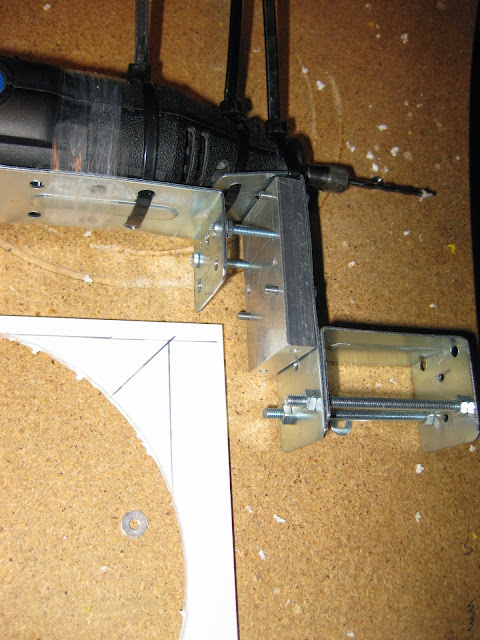
Using "Dremel circle cutter" cut two plastic circles
177mm Diameter for pressure sensitive surface
155mm Diameter for bottom base
In my case I build my own circle cutter
to make perfect circles please use following setup and check video for details.
Modify servo for continuous rotation
take apart servo and remove small tab from the large gear
make the following setup
upload a code to arduino with myservo.write(90);
then stop the servo by rotating pot
glue servo shaft with small amount of super glue.
do not insert pot shaft as it was before. just place pot diagonally into servo cavity.
Assemble servo.
RC servo to base mount
draw the next drawing on a bottom base

Align servo like on the pic using a ruler and pencil rod
Super Glue it
Wheels to servo
sandpaper wheel
Super Glue each wheel to servo horn (included with each HS-322HD servo)
use center tool(m3 bolt with tape/spacer) to align horn on center.
IR distance sensor
Super Glue it.
Neodymium Magnets
Drill 2.9mm holes
use 5 magnets for each hole in blue base and hemisphere.
glue only the last magnet to hemisphere.
Electronics
Just duplicate my circuit analogously to hi-res pics


1 comment:
wow!
Post a Comment